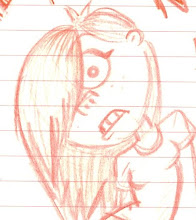
worth a watch anyways...
Saturday, 28 February 2009
Tadeo Jones
whilst reading through my rigging book, it recommended the animation Tadeo Jones for its character creation and advanced rigging created in 3ds max.

Thursday, 26 February 2009
there's summat wrong with your face!
i ventured on in to hunt down the techno wizard that is jamie and i must say a giganormous THANKS for all his help.


 now go back and display your face normals...the conform should have made them swap round
 yep yep...all working! horay!
 now i can use normals > soften edge and soon she will no longer look like a grey zombie child!

I initially explained what i'd been trying to do with the UV mapping and what i wanted to achieve with the overall look of my character. Although i really wish to learn UV mapping, Jamie suggested it wasn't the best use for it for just achieving block colours and that the look would be just the same as selecting the faces and assigning materials and colours to them. Only problem came to when i then tried to smooth the model and the colours began to bleed across the faces. Jamie then went through a process of separating the dungarees geometry and the torso and deleting unnecessary edges that were causing a few problems...it highlighted a few faces that require a slight tweak on my model but overall he said it was very good which is a big confidence booster. Ive been creating different sets so i can then seperate the elements to stop the colours from bleeding.
Alec showed me how to apply layered textures through his own method of naming the windows "click poland....POLAND" (the hypershade!) but i was very grateful for all his help :)
Finally...i had a problem with the old models face. As i complete part in nurbs and the rest in polys, there was some weird lines emerging where the sections had been joined and merged. This is not the way to model apparently even though i followed a tutorial given to us last year, obviously i need to read more into correct methods. Even applying normals > soften edge as wel as normals > set angle didn't work. Poor Jamie was summoned back and showed me through the display > polygons > face normals why the mesh wasn't working. Then he used normals > conform which then showed the change when turning back on the face normals. He explained that when you model, you want all the face normals to follow the same direction with them pointing out from the geometry. With the nurbs however and the conversion they pointed inwards which was wrong...luckily there was a method to solve this and it has allowed me to now use the soften edge tool. HORAY! i thought i'd have to go back over and remodel parts again!
Enough jargen...heres some images so you can see what the cotton pickin thing im on about:
Before...this is the state my models face was at. Now all converted to polys, you can see the different sections between the nurbs and original polygons. Apparently i should have used a nurbs sphere instead of poly sphere and used the create polygon tool to fill in the rest of the sections....lesson learnt.

Display > polygons > face normals. Here the origianl poly surface normals are correctly pointing outward from the model...

...whilst those that were nurbs (eye, nose and mouth area) are pointing inward inside the model.


select geometry then click normals > conform
 now go back and display your face normals...the conform should have made them swap round
 yep yep...all working! horay!
 now i can use normals > soften edge and soon she will no longer look like a grey zombie child!
Wednesday, 25 February 2009
UV
after discussions with Jared and Yaniv and my notes at hand, i've been giving UVing a go using Yaniv's recommended method of selecting faces and creating UVs via camera...it seems to be a careful process of not forgetting faces and stitching together.
 Adding in a few extra faces...think were about ready to sew together
 Maya then crashed so I lost all this work...helpful NOT!
IMAGES!
Dunga-ranga-rees. I thought i would start myself off with the biggest shape. I hope from my method to have as few a creases from the layout of the UVs. You can see here im in the mid of arranging the UVs into place to recreate the shape.
 Adding in a few extra faces...think were about ready to sew together
 Maya then crashed so I lost all this work...helpful NOT!
 Start again...
I tried a smaller section this time to see if the method i was using worked...i created a cylindrical map around the legs and imported the UVs into the texture editor..i then took these over to photoshop, applied the appropriate colour and err....not successful....had white spaces showing.
As ive never done texturing before, i have to admit i dont understand the full process...the reasons WHY you do things...im not sure what size these should match up to so after not getting very far with it, have decided to go seek help from Jamie tomorrow at college and see whats the best route to take. Im still hoping to have the texturing complete by the weekend so i then can move onto the blend shapes.
Unwrapping of the hair?!?!
 Dungarees texture sample...painted by a 4yr old :P
 UV snap shot


 New dunagrees test by plannar mapping each of the sides then sewing the edges together...i was following a tutorial by highend but i think its more a technique for faces.
 Relaxing the UVs...interesting....?!

mmm yeah im not really sure whats right etc here...think i'll go find Jamie tomorrow.
 Dungarees texture sample...painted by a 4yr old :P
 UV snap shot

 New dunagrees test by plannar mapping each of the sides then sewing the edges together...i was following a tutorial by highend but i think its more a technique for faces.
  Relaxing the UVs...interesting....?!
Tuesday, 24 February 2009
breaking news...
THE MODELING IS COMPLETE!
 miss pocahontus...the face still has some hard edges going on but my soften edge tool has gone to pot currently so this image will have to do for now. Im very pleased with how its looking and that i've finished! nooooooo waayyyyyyy! Its taken much longer than anticipated but hopefully getting a good model down will mean less problems for the next series of jobs. I think if i had worked in a group i would have been pushed into completing this stage earlier where as i was a bit more free to take my time over things...not always the best way! I wouldnt say this was out right wallace and gromit copy in terms of its style...i think i've taken essences from different areas of my research such as aardman, coraline and tim burton. However i've made it my own :)
 once smoothed :)
 ok next on the list of tasks to complete
and now the weather...scattered showers will commence with a light south westerly breeze
ENOUGH
so wanna see? bet you do...o go on then you've twisted my arm you scamps.
Pictorials
o lord..she looks like she was beaten with an ugly stick doesnt she?! well this is the basic head geometry stictched together...you can see i split the head into an eye panel, mouth and nose panel and connected it to the back of the head i had previously...breaking up the modelling seems to be a good working method for me.
 miss pocahontus...the face still has some hard edges going on but my soften edge tool has gone to pot currently so this image will have to do for now. Im very pleased with how its looking and that i've finished! nooooooo waayyyyyyy! Its taken much longer than anticipated but hopefully getting a good model down will mean less problems for the next series of jobs. I think if i had worked in a group i would have been pushed into completing this stage earlier where as i was a bit more free to take my time over things...not always the best way! I wouldnt say this was out right wallace and gromit copy in terms of its style...i think i've taken essences from different areas of my research such as aardman, coraline and tim burton. However i've made it my own :)
 once smoothed :)
 ok next on the list of tasks to complete
- Texturing - never done...ever! haha! I've had a lot explained to me though and taken notes so i guess its all in the practise.
- Blend Shapes - i've touched on this mildly before never in so much detail. I've completed my blend shape drawings so i know which expressions i wish to include for my model. (i would like these 2 sections complete by this week)
- Rigging - actually quite confident about this...i've drawn out my proposed rig and plotted my EP curves ready to go. (couple days)
- Skinning - never painted weights so this should be fun! (3 days)
- Animating - As time is running out, i wont be able to complete the short i originally thumbnailed. Instead i will complete a walk cycle/ demonstration of the rigs capabilities. (whatever time there is left)
- Lighting/Rendering - from my previous research i know the setting i need to apply to my scene so it hopefully shouldnt take too long. Since the final piece will be a short walk cycle im guessing it shouldnt take too long to render either...spesh with the help of the old render farm.
so not much then...lets go go go!!!
bits and bobs
its been an odd day today...
Some pics to show the resolved problemo:
had a discussion with Jared about my progress...or....lack of...well no not lack of, rather slowing down, confusion opinions etc. He also went through a bit of texturing with me as i've never done it before so its like stepping into a canoe without a paddle (im sure thats a phrase) I found the talk very useful and the methods he suggested but I then did ask Yaniv to show me how to complete these as its one thing to talk a load of information at me and another to show me, get me to have a go...Yaniv's very good at teaching so thank you :)
Another problem i have been having with the model was the strange triangle appearing on Poca's head...this was down to an accidental face being deleted but i really couldn't see why adding a new one would make it stick out like a sore thumb. Jared suggested it could be a few faces clashing with one another. However it wasn't and after deleting and remaking the face we were unable to merge the verts...pain...we (me and grigglesface) tried my maya file on his computer...success the verts merged and with a little help from Simon the triangle had disappeared via normals > set normal angle and using the default settings. I have gone back and tried this on my version of maya but it doesn't work so Im now convinced there is issue with my version of the software....i shall seek out a new one over easter.
I then asked the Ross-man some rigging issues about spline handles etc...another beautiful masterpiece drawing stays stashed in my notebook for safe keeping. I was originally considering spline handles for Poca's pig tails but Dave suggested simply using a jiggle deformer which would acheive the desired look for some nice secondary animation.
So this is a general blog to thank all those who helped me today and continue to help me
CHHHHEEERRRS GUUUUUYS :D
ok...it doesnt look very obvious does it...but it is...its very annoying and shows up if rendered! therefore PAIN!
 The new hair resolved thanks to the help of grigbear and simon through the use of normals > set normal angle. Cheers lads!

 The new hair resolved thanks to the help of grigbear and simon through the use of normals > set normal angle. Cheers lads!
Friday, 20 February 2009
EP
this is the way the industry works
 Make sure your curves fall correctly into position in all view points...check to make sure...don't want to be snapping a rig half way across the grid now! Fingers can be copied, pasted, adjusted in size accordingly. Re-name to pinky, ring, mid, pointer, thumb curves. Its good practice to be naming all elements of your scene and helps you for naming your joints later on. You don't need to create full chains ready for rigging (space between wrist and fingers) as its simple enough to create the joints in between. Marking out correctly now will save a lot of time later on.
 The spine is up to you how many joints/breaks you wish to have...its of course down to the character and what you want them to do. Whether your going to have a spline or FKs for controlling your character.

the industry works
the industry works
this is the way the industry works
so i read in me booooook
Modeling the face got er...boring...so i decided to take a break and plan my rig using EP curves so that i can simply snap the joints into place and hopefully *fingers crossed* have correct joint orientation so that the joints will rotate correctly.
Bring forth the screen prints:
create > EP curve option box...set to 1 linear
chose appropriate view for creating your curve, position in place...right click change verts where required. Only add verts for where you will snap your joints, this will hopefully speed up the rigging and aid joint orientation. Curves are labelled appropriately as is industry practice.
Here you can see I have created a leg curve and my reverse foot control curve ready for rigging...not sure if you need both but hey.
Make sure your curves fall correctly into position in all view points...check to make sure...don't want to be snapping a rig half way across the grid now! Fingers can be copied, pasted, adjusted in size accordingly. Re-name to pinky, ring, mid, pointer, thumb curves. Its good practice to be naming all elements of your scene and helps you for naming your joints later on. You don't need to create full chains ready for rigging (space between wrist and fingers) as its simple enough to create the joints in between. Marking out correctly now will save a lot of time later on.  The spine is up to you how many joints/breaks you wish to have...its of course down to the character and what you want them to do. Whether your going to have a spline or FKs for controlling your character.
Wednesday, 18 February 2009
'cos its too funny not to put on...
yes yes yes...i will remove in due course...but for now...miles of smiles :D
Subscribe to:
Posts (Atom)