back to the painting weights and it was a slow start...mainly cos i didn't note down which file i was working on...i have a filing system, but with a lot of corruption's occurring hadn't deleted old files....so i have like poc_model_new_032_new_v2_G and so on and so on....suffice to say i starting working on the weights when i realized this wasnt the one with updated geo...a note for the future and also a good way of keeping space on the mac which is sloooowwwwiiinnng dooooooowwwwwwnnn.
NB: need to look into for the future...or perhaps if anyone else knows why could answer?:
- why can i not "go to bind pose" i find i have to line up my model with the other side or type in 0s in order to get it back to its original pose. An error message reads: Pose not achieved, see diagnostics in the script editor.
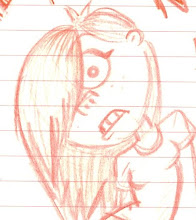
AND NOW! for some hilarity...some of the weird and wonderful things Poca was doing...o we laughed hahahahahahaha
two face!

 the head had a mind of its own as you can see from this half and half image...left with full influence to the head...right with too little = warping.
 braaaaain explosion! had to push the head to big extremes to get to the head geometry underneath the hair piece and paint influnce to the head.
 her false teeth also needed painting separately as well as selecting verts and removing other unnecessary influence.
 painting weights is great! its like putting your model through TORTURE! muahahahhaaaaa :)
painting weights is a paaaaaaaaiiin when you accidently delete one of your rig controls...yes put them on a layer i hear you say...layers does not work on my maya...damit
whats been an annoying piece of geometry? THE KNEEEEEEEEEEEEEEEEE. Those dunga-runga-rees do there best to crunch, squash when i lift her leg up. I think the main issue is down to the design...note for future designs there.
can you tell im here every now and then updating this post?
i dont remember writing that
Painting weights is a delicate process...its also a balance of looking at the low poly and smoothed version in order to get the real impression of how its looking.
Its already highlighted what i need to do modelling wise and rigging wise for future projects...i guess the only way to learn is to do, and with practice it can only get better.
Some more images:
before: the neck influence is too great here as its pulling on the tshirt geometry.
 demonstration of the rigs capabilities...looking much better with the painted weights on the body.
 the knee has been one of the more difficult areas to weight due to the turn up on the dungarees...her hip joint also should have been a bit higher so to compensate ive painted the hip joint to give a bit more so the leg can be raised up for the walk cycle.
  head lean, arm down, left to right comparison...ive worked on weighting the left side (screen right)
 closer look at the arm down...again a note for the future to not allow the clothing such as the dungarees or tshirt sleeves to be too big as it limits how much the arms can be pulled into the body.

No comments:
Post a Comment