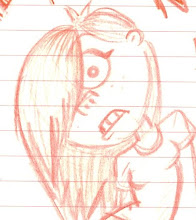
the face has been causing me immense PAIIIIIIN.jokes but its been a bit confuddle dundling (doesnt that make it sound sweeeeeet) NO
so i have been concentrating my efforts on Poca's hair. Originally i was going to extrude the top faces from the head geometry and tweak the verts to create the desired shape. However, last week Yaniv showed me how using curves could be more effective for creating the hair. So i tried this...then i tried extruding a cylinder....it exploded thanks to my idiocy at extruding verts...
 ...the explosion and the many many faces that would need deleting so it smoothed ok would take a good while. SO...back to curves and i tried not to complete a finished model, just create the basic shape and converted to polys to then finish the modeling.
This was another attempt i tried by pulling the verts of a poly sphere...didnt work very well.

Ok so heres the almighty curves dum dum duuuuuumm. Poca's hair is sort of like an ice-cream blob...aardman style hair So i places a number of curves to line up with the front and side profiles of the character, changing the width accordingly. You can see where i have started the front section of hair too...
 sections lofted...not looking too bad but i find its much easier to get the basic shape and tweak afterwards...
 Section is converted to polys then shaped further.
 Soften edges through the normals options. Perhaps it still requires some more edge loops so its not so dependant on the smooth. The other pig tail can simply be mirrored...copied etc since the hair was created in halves....time saver...exactly what i need at this moment!
 Soon after this...the duplicate tool...lofting tool...nothing displays...strrrraaange. I've cleaned my outliner and...no success. Tried resetting the display settings to see if this was the problem...no success. It was time to walk away before i threw the laptop out the window...tomorrow is another day and if it still not working, best head on in to college and use the computers there see if its something to do with my mad maya.
'ANG ON THERE SKIPPER...there's more
yes the tools are back in toooooown...no idea why...they must have heard me moaning or decided to gimme a break but after losing the duplicate, delete history, merge verts, loft tool (just about everything u need to model) they arrived back and i was on hot persuit to get back on track.
more images!
converted to polys...now the verts can be properly tweaked to give the final blob hair shape.
 creating the hair line with nurbs curves:

 Build up the shape like a hat, making sure the verts dont stray too far from the head geometry.
 I only focused on one side as i was going to half and mirror over the geometry to ensure it was symmetrical

loft...
 The hair piece...shes actually bald! After trying to connect the verts of the pig tails, i found the best and simplist method was to allign the geometry into the correct place and combine. This does not have any undsired affect once smoothed and gives a good reflection of plasticine just pushed stuck onto the hair. Although I have combined it, I may need to seperate when it comes to texturing to make sure all areas are covered. The fringe remains detached at the moment.

Why does this happen if I use normals > soften edge too much? Is there a limit to using this tool?
 Yeah yeah i know i know...wheres her eye thing...stop looking at that...were looking at the hair here. Side view:

 The finished do....very pleased with this outcome :) Just shows that its worth it to keep going no matter how many attempts/ways you try

 And in wireframe on shaded just for all you nut bags that want a closer look at how it was constructed.
 Make sure your curves fall correctly into position in all view points...check to make sure...don't want to be snapping a rig half way across the grid now! Fingers can be copied, pasted, adjusted in size accordingly. Re-name to pinky, ring, mid, pointer, thumb curves. Its good practice to be naming all elements of your scene and helps you for naming your joints later on. You don't need to create full chains ready for rigging (space between wrist and fingers) as its simple enough to create the joints in between. Marking out correctly now will save a lot of time later on.
  The spine is up to you how many joints/breaks you wish to have...its of course down to the character and what you want them to do. Whether your going to have a spline or FKs for controlling your character.